


eHow may earn compensation through affiliate links in this article.
Get kids excited to go back to school with these adorable school-themed cupcakes. They're topped with yummy, edible books, binder paper, pencils and rulers to get everyone in the school spirit. No matter what grades they're earning this year, you've already got yourself an A+ in treats.
Video of the Day
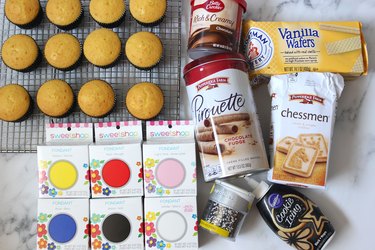
Things You’ll Need
-
White fondant
-
Pepperidge Farm Chessmen Cookies
-
Red and blue edible markers
-
Yellow fondant
-
Vanilla wafers
-
Black cookie icing
-
Pepperidge Farm Pirouette Cookies
-
Pink fondant
-
Black fondant
-
Blue fondant
-
Red fondant
-
Green fondant
-
Cupcakes
-
Frosting
-
Black and white sprinkles
Make the Binder Paper
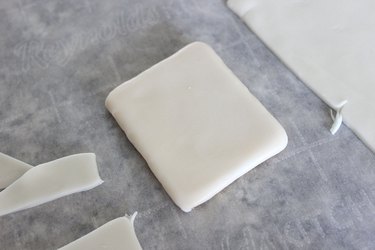
Step 1: Roll the Fondant
Roll a piece of white fondant to about one-eighth inch thick.

Step 2: Attach a Rectangular Cookie
Pepperidge Farm Chessmen Cookies are the perfect shape and size for the binder paper. Position the cookie on top of the rolled fondant, and cut off the excess fondant surrounding the cookie.

Flip the cookie and fondant over. Press the fondant into the sides of the cookie to secure it. The fondant will be stretchable at this point, so you can work it around the edges.
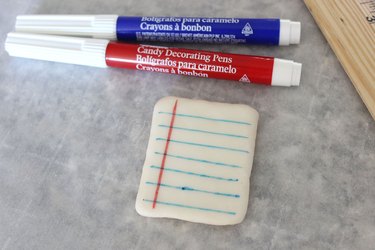
Step 3: Draw the Lines
Using a marker with blue edible ink, draw horizontal lines across the fondant-covered cookie. A ruler can help you draw straight lines. Use a marker with red edible ink to draw one vertical line along the left side.
Make the Rulers
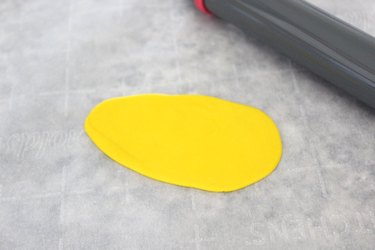
Step 1: Roll Yellow Fondant
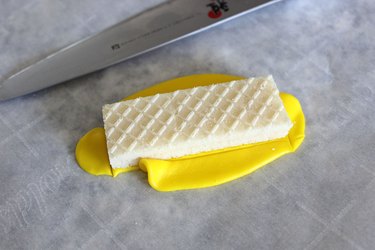
Roll a piece of yellow fondant into an oval shape that is about one-eighth inch thick.
Step 2: Attach a Vanilla Wafer
Trim a vanilla wafer to about three inches in length.
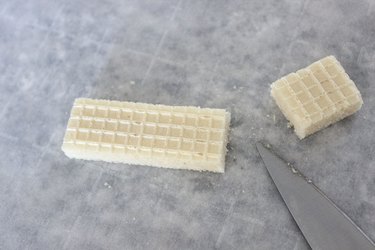
Position the vanilla wafer on top of the rolled yellow fondant, and trim the excess fondant around the wafer.
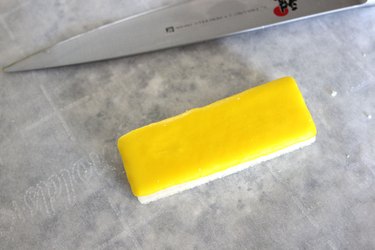
Flip the wafer and fondant over. Press the fondant around the edges of the wafer to secure it.
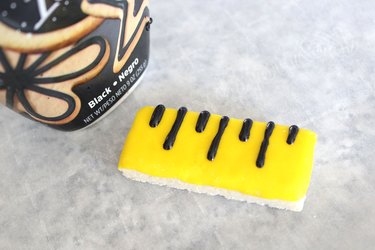
Step 3: Draw the Measurement Marks
With cookie icing, draw alternating short and long measurement marks along one edge of the yellow fondant-covered ruler. Cookie icing dries hard in about an hour, so it will not smudge when you touch it.
Make the Pencils
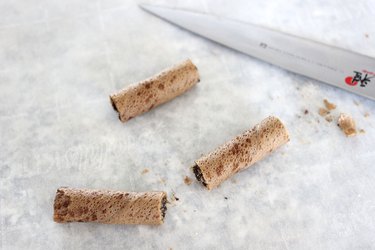
Step 1: Cut Pieces of Pirouettes
Pepperidge Farm Pirouettes are long, cylinder-shaped cookies that are perfect as the core of our edible pencils. Cut the Pirouettes into sections that are about one and a half inches long.
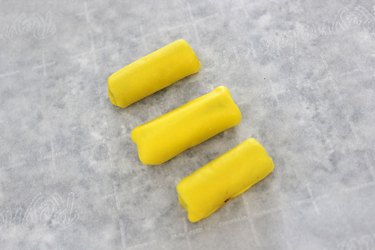
Step 2: Wrap Pirouettes in Fondant
Roll out pieces of yellow fondant to about an eighth-inch thickness. Then wrap the pirouettes in the fondant.
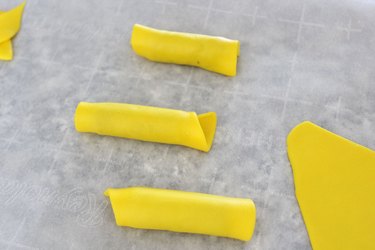
Trim the excess fondant at the ends.
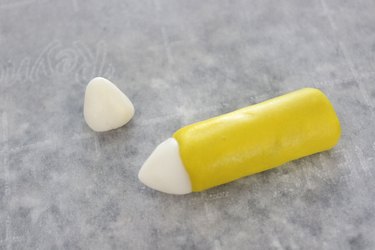
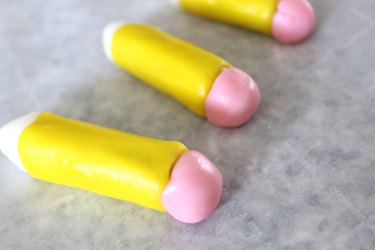
Step 3: Attach the Pointed End
To create the sharpened end of the pencil, mold a small piece of white fondant into a cone and attach it to one end of the yellow cylinder. Press the two pieces of fondant together to help them adhere.
Step 4: Attach the Eraser
Roll a small piece of pink fondant into a ball and press it into the other end of the yellow cylinder.
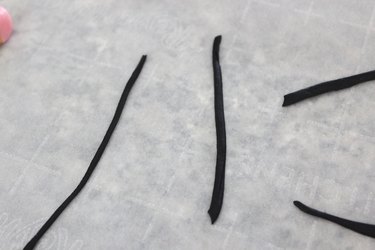
Step 5: Finish with Black Details
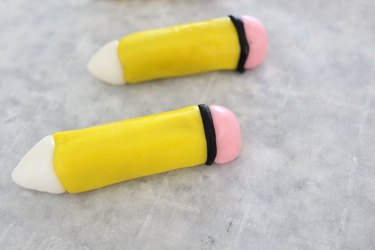
Roll a piece of black fondant flat to about an eighth-inch thickness. Cut long skinny strips out of the fondant.
Wrap the strips of black fondant around the pencil between the yellow section and the eraser.
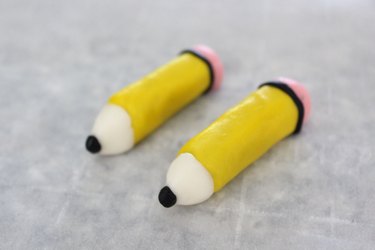
Attach a small dot of black fondant at the very tip for the pencil lead.
Make the Books
Step 1: Cut Vanilla Wafers
For the interior of the books, we're once again using vanilla wafers. Cut the wafers into rectangular shapes. With each wafer, you can make three to four books.

Step 2: Wrap Fondant Book Cover Around Wafer
Roll a piece of fondant in the color of your choice to about an eighth-inch thickness, making sure it is more than twice the size of your wafer. Position the wafer on the right side of the fondant.

Tip
To help the wafer adhere to the book cover, lightly moisten the fondant.
Trim the excess fondant around the wafer on the top and bottom as well as the right side, leaving a little bit of fondant extending past the edges of the wafer. Leave the extra fondant on the left side for now.

Pull the fondant to the left of the wafer over the wafer like you are closing a book.

Flip the book over and cut off the excess fondant on the bottom.


Step 3: Mark the Spine
With the dull edge of a knife, score an indentation mark on the left side of the book for the spine.

Make the Apple
Step 1: Roll Red Fondant
The books look especially sweet with an apple on top. Roll a piece of red fondant into a small ball. With a toothpick, create a crater at the top of the red ball.

Step 2: Attach Fondant Leaf
Attach a small tear drop-shaped piece of green fondant on top of the apple for the leaf.

Assemble the Cupcakes
Step 1: Prepare the Cupcakes
Bake the cupcakes either from scratch or with a box mix. I used a box mix because I just love yellow cake mix.

We want the cupcakes to have a relatively flat surface so the elements that are placed on top will stay steady. If your cupcakes have a big dome on them, trim the tops to make them flat.

Step 2: Frost the Cupcakes
Spread a layer of frosting on top of the cupcakes. I used store-bought chocolate frosting and applied it with a piping bag. You can also spread it with a spatula, but I find that a piping bag gives me better control.

Step 3: Add Sprinkles
Shake some black and white sprinkles on top of the frosting, especially around the outer edges. The black and white sprinkles make the surface of the cupcake look like a black and white composition book.

Step 4: Position the Toppers
The rectangular cookie depicting binder paper will be the common element in all the cupcakes. I wanted the books, pencils and rulers to sit on the binder paper cookies rather than just sitting on top of the frosting where they could sink in or slide off. Place the binder paper cookie on top of the cupcake and gently press down to let the frosting adhere to the bottom of the cookie.

Now you can place the other elements on top of the binder paper platform. For the pencils and the rulers, lightly moisten the bottoms where they will make contact with the fondant on the binder paper. The moisture will help them adhere and stay in place.


For the book, moisten the bottom and attach it to the binder paper. Then moisten the bottom of the apple and adhere it to the top of the book.

You could say these cupcakes have "class."


