


The lunch counter folds down for easy storage. Image Credit: Debbie Williams
It's amazing what you can do with an old entertainment center. First we turned ours into an adorable kid's kitchen. But why stop there? We decided to add even more fun by building a retro kid's diner on the back. Because the two really should go hand and hand, don't you think?
Video of the Day
Add a Chalkboard to the Back of the Cabinet
 Add a chalkboard to the back of the cabinet. Image Credit: Debbie Williams
Attach a piece of pre-made chalkboard to one side of the cabinet. If you happen to have a piece of plywood on hand, you can paint it with chalkboard paint. But if you're buying it, you'll find that pre-made chalkboard is typically cheaper. TIP: Drill pilot holes or use small finish nails to avoid chipping the chalkboard.
Build Out the Back
 Use two coats of paint for best results. Image Credit: Debbie Williams
Fill any remaining areas by with plywood in a thickness that will make all surfaces of the back flush with one another. Paint two coats of the base color. All surfaces should be flush before proceeding.
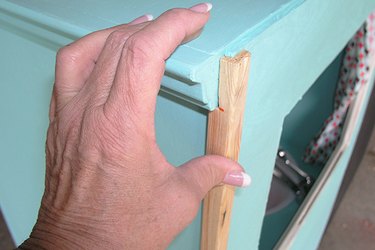
Cut the Trim
 Cut and pre-fit all trim pieces. Image Credit: Debbie Williams
Cut corner trim to fit the edges of the cabinet, covering up the raw edges. You might have to notch out areas to make the corners fit the existing trim.
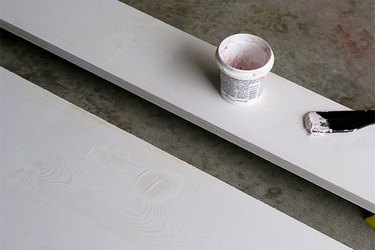
Cut the Remaining Pieces
 Paint boards and trim. Image Credit: Debbie Williams
Cut a 1-inch by 12-inch pine board and a 1-inch by 2-inch pine board the width of the cabinet between the corner trim pieces. (You're going to put these boards together to make the lunch counter.) Measure the cabinet across the top. Cut a 1-inch by 6-inch pine board this measurement for the diner sign. Paint a coat of primer on all boards and trim pieces, and let them dry completely. Fill any knots, gouges or holes with spackle and sand until smooth. Apply the finish coats of paint.
Install the Trim
 Use finish nails to install the trim. Image Credit: Debbie Williams
Install the trim, including the corner trim and the window frame. Drill pilot holes and use finish nails to attach the trim.
Build the Lunch Counter
 Carefully chisel out slots for the hinges. Image Credit: Debbie Williams
The lunch counter is constructed from the 1-inch by 12-inch board and the 1-inch by 2-inch board so that it can hang down, making the diner easy to store. Lay the two boards tightly together and mark hinge locations on the edges of each board. Score along the marked lines with a utility knife. Using a wood chisel with the tapered edge against the wood, tap with a hammer and remove about 1/8 inch material. Install the hinges. TIP: Take your time and remove small amounts of material at a time.
Install the Angle Brackets
 Install angle brackets to support the counter. Image Credit: Debbie Williams
Draw a level line along the back of the cabinet, about 19 inches off the ground. Install small angle brackets, making sure the bracket screws are anchored securely into solid wood.
Install the Counter
 The hinges let you fold down the counter for storage. Image Credit: Debbie Williams
Have a helper set the counter on the brackets and hold it in place. From the underside, install screws through the angle bracket into the 1-inch by 2-inch section of the counter. Carefully lower the front edge of the counter to make sure it is secure.
Mount the Shelf Brackets
 Shelf brackets hold the counter up when needed. Image Credit: Debbie Williams
Add shelf brackets to hold the counter in the upright position when needed. Mark the mounting positions on the brackets. Drive screws to attach two hinges to one side of each bracket. Have a helper hold the counter in the upright position. Hold the shelf bracket under the counter at a level height and install screws through the hinges and into the back wall. Make sure the screws hit solid wood.
Add a Diner Sign
 The lunch counter diner is a hit with kids. Image Credit: Debbie Williams
Spruce up your diner with a painted sign. Install the sign with hinges so that it can lay flat for storage, and flip up when the diner is open.


