


1 of 11
Overview
Enjoy your yard later in the fall and earlier in the spring by adding a fire pit to your landscape. There’s a primal “caveman” satisfaction to sitting around an open fire. For less than $200 and an easy weekend’s worth of work you can create a focal point in your yard that is a safe and attractive place to build a fire. Check your local ordinances for limitations on outdoor fires.
Jeff Farris 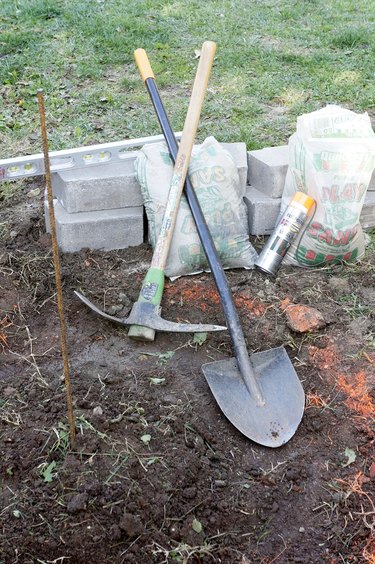 2 of 11
Things You Will Need
You will need 36 – 42 wedge shaped landscaping blocks. The number depends on the angle of the block. Twelve, thirteen or fourteen blocks will form a complete circle, depending on brand and style. Product literature or someone at your home center can help you determine the full circle number. Three courses makes an attractive height. You’ll also need a couple bags of sand. As for tools, you’ll need a mattock, shovel, level, mallet, landscaping spray paint, a steel stake and a piece of string.
Jeff Farris  3 of 11
Determine Size
Layout a full circle of blocks in an area close to, but not in the area, where you’re going to build your fire pit. Measure across the diameter. Round up to the nearest 6 inches and divide that measurement in half.
Jeff Farris  4 of 11
Mark Excavation
Drive a steel stake in the exact center of the spot you have picked out for the fire pit. Tie loops in both ends of a piece of string, adjusting the length to match the measurement calculated in the last step. Hold the landscape paint in one end with the other end around the center stake. Walk around the center stake, painting an outline for your excavation.
Jeff Farris 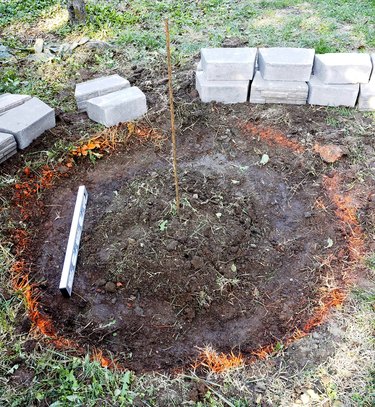 5 of 11
Remove Sod and Level
Remove the sod with the mattock and shovel, keeping the excavation as level as possible. Check with a level in all directions. Always adjust by removing material. Don’t mound material up on the low side. It will settle over time and your fire pit will lean.
Jeff Farris 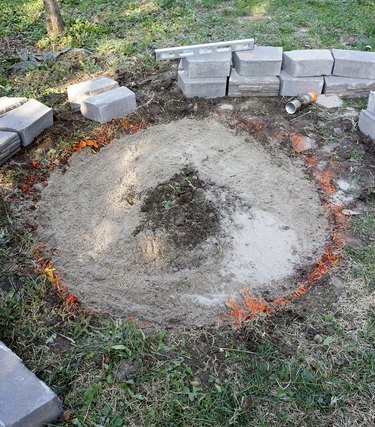 6 of 11
Add Sand
Add a thin layer of sand over the entire perimeter area where you will lay the block.
Jeff Farris  7 of 11
Lay First Course
Lay the blocks in the bottom row carefully, checking level of each block and of the blocks relative to each other. Add or remove sand as necessary to level each block. Be sure that you are not adding too much sand under the block. You want the blocks resting on a half inch or less of sand.
Jeff Farris  8 of 11
First Course Final Inspection
When the first course is complete and level all around, the lion’s share of the work is done. If you’re careful with this part, the rest is as simple as working with children’s building blocks.
Jeff Farris 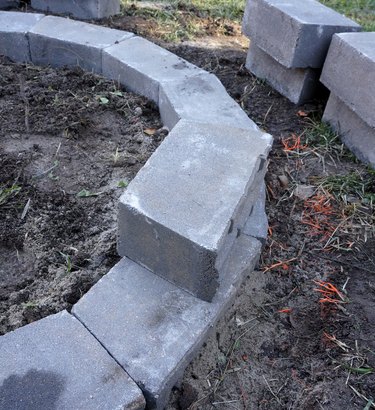 9 of 11
Add Remaining Blocks
Offset the second course, starting the middle of the block directly above a seam in the first course and with the lip at the back of the block lapped over. Repeat for the third course.
Jeff Farris  10 of 11
Ready to Fire Up
Rake and clean up around the fire pit, then lay in a fire of small kindling and larger dry firewood. Enjoy with friends, family, smores and your favorite beverages.
Jeff Farris 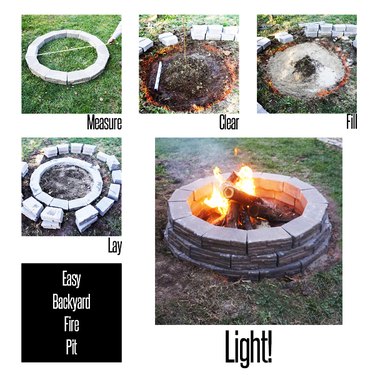 11 of 11
Try It Yourself!
Give it a go, it’s easier than you think.
Jeff Farris


")


